WORM_BUBLIK.GX
Backdoor:Win32/Caphaw.D (Microsoft), Trojan-Ransom.Win32.Foreign.ybs (Kaspersky), a variant of Win32/Kryptik.ASIB trojan (Eset)
Windows 2000, Windows Server 2003, Windows XP (32-bit, 64-bit), Windows Vista (32-bit, 64-bit), Windows 7 (32-bit, 64-bit)


Threat Type: Worm
Destructiveness: No
Encrypted: Yes
In the wild: Yes
OVERVIEW
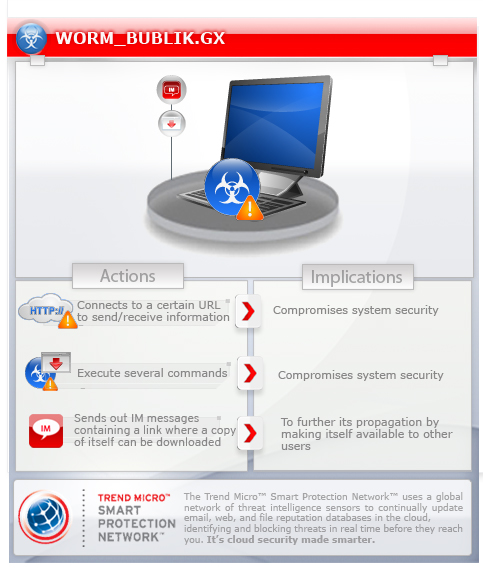
This malware spams messages to users using Skype in order to propagate. The spammed messages contain links that lead to an automatic download of the malware itself. This malware also has backdoor routines, which compromises an affected system's security.
To get a one-glance comprehensive view of the behavior of this Worm, refer to the Threat Diagram shown below.
For the related story, you may read the blog post Shylock Not the Lone Threat Targeting Skype
This worm arrives on a system as a file dropped by other malware or as a file downloaded unknowingly by users when visiting malicious sites.
It executes commands from a remote malicious user, effectively compromising the affected system. It connects to a website to send and receive information.
It also has rootkit capabilities, which enables it to hide its processes and files from the user.
TECHNICAL DETAILS
Arrival Details
This worm arrives on a system as a file dropped by other malware or as a file downloaded unknowingly by users when visiting malicious sites.
Installation
This worm drops the following copies of itself into the affected system and executes them:
- %Application Data%\{random folder found}\{filename found in %System%}
(Note: %System% is the Windows system folder, which is usually C:\Windows\System32.)
It drops the following files:
- {removable drive letter}:\{random folder name}\$REChCLE.BIN
- {removable drive letter}:\{random folder name}\thLmbs.db
- {removable drive letter}:\{random folder name}\vagefile.sys
- {removable drive letter}:\{random folder name}\desktopfini
- {removable drive letter}:\{random folder name}\readme.tat
Autostart Technique
This worm adds the following registry entries to enable its automatic execution at every system startup:
HKEY_CURRENT_USER\Software\Microsoft\
Windows\CurrentVersion\Run
{random CLSID} = "%Application Data%\{random folder found}\{filename found in %System%}"
Backdoor Routine
This worm executes the following commands from a remote malicious user:
- Remote Desktop / Remote Access
- Download & Upload Files
- Update And Uninstall self
- Download and Load Additional Plugins
>Disk Propagation - {Hostname}/files/010-update-vl0d3/dsp.psd
>Messenger Propagation - {Hostname}/files/010-update-vl0d3/msg.gsm
>BackSocks - {Hostname}/files/010-update-vl0d3/Bot.dll - Redirect network traffic
- Monitor Browser Activity
It connects to the following websites to send and receive information:
- https://{BLOCKED}s.cc/ping.html
- https://{BLOCKED}s.su/ping.html
- https://{BLOCKED}s.su/ping.html
- https://{BLOCKED}ections.cc/ping.html
- https://{BLOCKED}ections.su/ping.html
- https://{BLOCKED}ctions.su/ping.html
Rootkit Capabilities
This worm also has rootkit capabilities, which enables it to hide its processes and files from the user.
Information Theft
This worm gathers the following data:
- Installed Applications
- Directory and File List
- Drive Informations
- Network Information
- Username
- Computername
- OS Version
- Hardware Information
- Running Processes
NOTES:
This worm creates .LNK (shortcut) files using folder names found in removable drives. It then hides the original folder tricking users to click .LNK files. This .LNK files point out to a dropped copy of itself in the removable drive using a {random folder found in removable}\{random name}.{random extension}.
SOLUTION
Step 1
Before doing any scans, Windows XP, Windows Vista, and Windows 7 users must disable System Restore to allow full scanning of their computers.
Step 2
Scan your computer with your Trend Micro product and note files detected as WORM_BUBLIK.GX
Step 3
Restart in Safe Mode
Step 4
Delete this registry value
Important: Editing the Windows Registry incorrectly can lead to irreversible system malfunction. Please do this step only if you know how or you can ask assistance from your system administrator. Else, check this Microsoft article first before modifying your computer's registry.
- In HKEY_CURRENT_USER\Software\Microsoft\Windows\CurrentVersion\Run
- {random CLSID} = "%Application Data%\{random folder found}\{filename found in %System%}"
- {random CLSID} = "%Application Data%\{random folder found}\{filename found in %System%}"
Step 5
Search and delete these files
- {removable drive letter}:\{random folder name}\$REChCLE.BIN
- {removable drive letter}:\{random folder name}\thLmbs.db
- {removable drive letter}:\{random folder name}\vagefile.sys
- {removable drive letter}:\{random folder name}\desktopfini
- {removable drive letter}:\{random folder name}\readme.tat
Step 6
Restart in normal mode and scan your computer with your Trend Micro product for files detected as WORM_BUBLIK.GX. If the detected files have already been cleaned, deleted, or quarantined by your Trend Micro product, no further step is required. You may opt to simply delete the quarantined files. Please check this Knowledge Base page for more information.
Did this description help? Tell us how we did.