RANSOM_GOLDENEYE.B
Trojan-Ransom.Win32.Petr.eu (Kaspersky), Trojan:Win32/Petya.G (Microsoft)
Windows


Threat Type: Trojan
Destructiveness: No
Encrypted: Yes
In the wild: Yes
OVERVIEW
Dropped by other malware
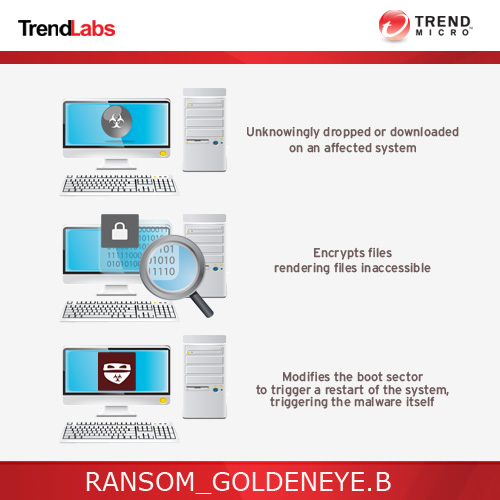
This ransomware, discovered in December 2016, has been found to be connected to Mischa and Petya ransomware. Users affected by this malware will experience system reboot, which will then execute the ransomware's routine of encrypting files.
To get a one-glance comprehensive view of the behavior of this Trojan, refer to the Threat Diagram shown below.
This Trojan may be dropped by other malware.
TECHNICAL DETAILS
260,608 bytes
EXE
Yes
07 Dec 2016
Encrypts files, Drops files
Arrival Details
This Trojan may be dropped by the following malware:
Installation
This Trojan drops the following copies of itself into the affected system and executes them:
- %UserProfile%\Application Data\{GUID}\{random filename}.exe
It drops the following files:
- %Desktop%\YOUR_FILES_ARE_ENCRYPTED.TXT
(Note: %Desktop% is the desktop folder, where it usually is C:\Documents and Settings\{user name}\Desktop in Windows 2000, Windows Server 2003, and Windows XP (32- and 64-bit); C:\Users\{user name}\Desktop in Windows Vista (32- and 64-bit), Windows 7 (32- and 64-bit), Windows 8 (32- and 64-bit), Windows 8.1 (32- and 64-bit), Windows Server 2008, and Windows Server 2012.)
Other Details
This Trojan encrypts files with the following extensions:
- 3dm
- 3ds
- 3fr
- 3g2
- 3ga
- 3gp
- a2c
- aa
- aa3
- aac
- accdb
- aepx
- ai
- aif
- amr
- ape
- apnx
- ari
- arw
- asf
- asp
- aspx
- asx
- avi
- azw
- azw1
- azw3
- azw4
- bak
- bat
- bay
- bin
- bmp
- camproj
- cat
- ccd
- cdi
- cdr
- cer
- cert
- cfg
- cgi
- class
- cmf
- cnf
- conf
- config
- cpp
- cr2
- crt
- crw
- crwl
- cs
- csv
- cue
- dash
- dat
- db
- dbf
- dcr
- dcu
- dds
- default
- der
- dfm
- directory
- disc
- dmg
- dng
- doc
- docm
- docx
- dtd
- dvd
- dwg
- dxf
- eip
- emf
- eml
- eps
- epub
- erf
- fff
- flv
- frm
- gfx
- gif
- gzip
- h
- htm
- html
- idl
- iiq
- indd
- inf
- iso
- jar
- java
- jfif
- jge
- jpe
- jpeg
- jpg
- js
- json
- jsp
- k25
- kdc
- key
- ldf
- lit
- localstorage
- m3u
- m4a
- m4v
- max
- mdb
- mdf
- mef
- mkv
- mobi
- mov
- movie
- mp1
- mp2
- mp3
- mp4
- mp4v
- mpa
- mpe
- mpeg
- mpg
- mpv2
- mrw
- msg
- mts
- mui
- myi
- nef
- nrg
- nri
- nrw
- number
- obj
- odb
- odc
- odf
- odm
- odp
- ods
- odt
- ogg
- orf
- ost
- p12
- p7b
- p7c
- pages
- pas
- pbk
- pdd
- pef
- pem
- pfx
- php
- png
- po
- pps
- ppt
- pptm
- pptx
- prf
- props
- ps
- psd
- pspimage
- pst
- ptx
- pub
- py
- qt
- r3d
- ra
- raf
- ram
- rar
- raw
- result
- rll
- rm
- rpf
- rtf
- rw2
- rwl
- sql
- sqlite
- sqllite
- sr2
- srf
- srt
- srw
- svg
- swf
- tga
- tiff
- toast
- ts
- txt
- vbs
- vcd
- vlc
- vmdk
- vmx
- vob
- wav
- wb2
- wdb
- wma
- wmv
- wpd
- wps
- x3f
- xlk
- xls
- xlsb
- xlsm
- xlsx
- xml
- xps
- xsl
- yml
- yuv
- zip
NOTES:
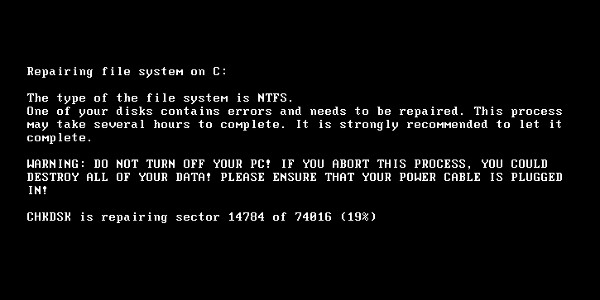
It modifies the boot sector of the affected system to automatically load itself. It then restarts the system effectively executing its routines.
Once the machine is restarted, the following message is displayed on the user's screen:
It also displays the following screen:
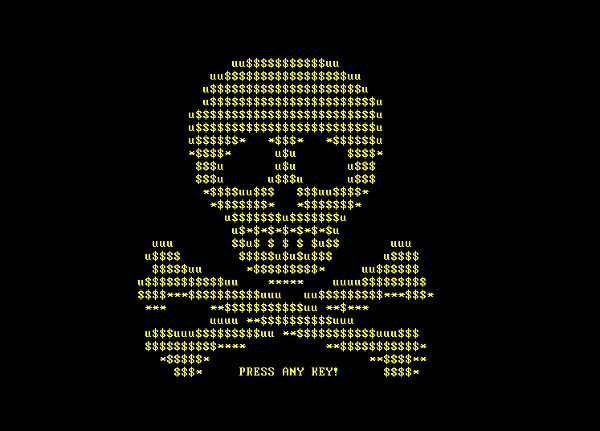
When a key is pressed, the following ransom note is displayed:

SOLUTION
9.800
12.946.06
07 Dec 2016
12.947.00
08 Dec 2016
Step 1
Before doing any scans, Windows XP, Windows Vista, and Windows 7 users must disable System Restore to allow full scanning of their computers.
Step 2
Restore your system's Master Boot Record (MBR)
To restore your system's Master Boot Record (MBR):
• On Windows 2000, XP, and Server 2003:
- Insert your Windows Installation CD into your CD drive then restart your computer.
- When prompted, press any key to boot from the CD.
- On the Main Menu, type r to enter the Recovery Console.
(Note for Windows 2000: After pressing r, type c to choose the Recovery Console on the repair options screen.) - Type the number that corresponds to the drive and folder that contains Windows (usually C:\WINDOWS) and press Enter.
- Type your Administrator password and press Enter.
- In the input box, type the following then press Enter:
fixmbr {affected drive} - Type exit and press Enter to restart the system normally.
• On Windows Vista, 7, and Server 2008:
- Insert your Windows Installation DVD into the DVD drive, then press the restart button on your computer.
- When prompted, press any key to boot from the DVD.
- Depending on your Windows Installation DVD, you might be required to choose the installation language. On the Install Windows window, choose your language, locale, and keyboard layout or input method. Click Repair your computer.
- Select Use recovery tools that can help fix problems starting Windows. Select your installation of Windows. Click Next.
- If the Startup Repair window appears, click Cancel, Yes, then Finish.
- In the System Recovery Options menu, click Command Prompt.
- In the Command Prompt window, type the following then press Enter:
BootRec.exe /fixmbr - Type exit and press Enter to close the Command Prompt window.
- Click Restart to restart your computer normally.
• On Windows 8, 8.1, and Server 2012:
- Insert your Windows Installation DVD in the DVD drive, then restart your computer.
- When prompted, press any key to boot from the DVD.
- Depending on your Windows Installation DVD, you might be required to select the keyboard layout. Then on the Windows Setup window, choose your language, locale, and input method. Click Next, then click Repair your computer.
- Click Troubleshoot>Advanced Options>Command Prompt.
- In the Command Prompt window, type the following then press Enter:
BootRec.exe /fixmbr - Type exit and press Enter to close the Command Prompt window.
- Click Continue to restart the system normally.
Step 3
Remove the malware/grayware file dropped/downloaded by RANSOM_GOLDENEYE.B. (Note: Please skip this step if the threat(s) listed below have already been removed.)
Step 4
Search and delete this file
Step 5
Scan your computer with your Trend Micro product to delete files detected as RANSOM_GOLDENEYE.B. If the detected files have already been cleaned, deleted, or quarantined by your Trend Micro product, no further step is required. You may opt to simply delete the quarantined files. Please check this Knowledge Base page for more information.
Step 6
Restore encrypted files from backup.
Did this description help? Tell us how we did.